Quick Reference
- If you do not know who is your assigned SA, you
can find the name on the observing schedule posted in
the Remote Ops I or available online.
Home and cell phone numbers are posted on the cork
board behind the monitors of the instrument observing
station. They should also be available from your
Keck Observer Login.
- You should make sure to discuss the following
points with your SA:
- Plans for afternoon and night calibrations.
- Instrument issues, recent changes and latest news (e.g. focus procedures, recent
problems, setups, detector info, etc).
- Telescope issues: plan to perform a MIRA, our nighttime focus procedure. (Autofocus is no longer an option.)
- Any other questions, requests and needs you may have.
- Consult the on-line
Keck II observing schedule. Find the listing for
today's date (note that the dates are HST, not UT dates).
- The third column of the table will indicate the Account
you have been assigned. For example, if it reads
kcwi1, your account is kcwi1. Use
this account name (in lowercase) when logging in to Keck
computers.
- The sixth column of the table will indicate your Program ID under
PROGID. Note this program ID for use in setting up your configurations
and calibrations.
Whether observing from Waimea, from a mainland observing site, or
within the Keck Remote Observing software,
KCWI observers run all instrument software within
VNC desktops. Generally, VNC
servers for your run should be up and running when you arrive to
observe. Please follow the appropriate set of steps below to
launch your VNC viewers on the primary and secondary
workstations.
Waimea Startup Procedure
- Log in to the observing seat.
Log into the thin client in Remote Ops II under your
assigned numbered KCWI account (e.g., kcwi5; if
needed, please contact your Support Astronomer to get the
password).
- Launch VNC desktops. Open a terminal on the local computer and use:
start_keck_viewers kcwi5
Mainland Startup Procedure
The procedure for launching VNC desktops from remote sites
varies from site to site, but generally follows this
procedure:
- Log in.
Log in to primary and (if
applicable) secondary machines using account and
password provided by the site manager.
- Launch VNC desktops.
Your site may have custom instructions, but you likely follow a variation
of the Remote Observing Software procedure below. Check your connection
and site startup procedure SEVERAL DAYS before your scheduled observing.
Remote Observing Software Startup Procedure
Refer to
Keck Remote Observing Github for installation instructions. After installation,
cd ~/RemoteObserving
conda activate KRO
./start_keck_viewers kcwiN
- Start a browser: From the desktop menu select Web Browsers -> Launch Firefox
- Click on the link labeled Instrument
Ready? available on the side menu on any Instrument page.
- In the upper right of SIAS check the instrument
status. If it reads KCWI
READY on a green background the instrument is ready
for use. If the message is KCWI
NOT READY on a red background, then KCWI has not
been released for your use. If it is after the nominal
release time (4:00pm weekdays, 3:30pm weekends) contact your
SA for assistance.
- Check if the Keck 2 Telescope has been released (same color scheme
as for the instrument being released). If the telescope is not released,
you can take internal calibrations but NOT dome flats.
You now have the choice of maintaining paper or electronic logs
for your observing run.
Electronic logsheets
The Keck Observing Log Archive (KEOLA) maintains an on-line log of
your run which you can access through the browser window to view
or edit. This log is generated whether or not you choose to use
it, and is only accessible from within the Keck network, not from
outside, so if you are observing remotely you must launch a
browser within VNC to access the electronic logs. For full
instructions, please refer to the KEOLA
webpage.
After your observing run, your logs can be found at the bottom of your
Keck Observer page.
- Start up the KCWI software.
- Right click on the background to access the KCWI menu.
- Select KCWI Control Menu.
- Select Start All KCWI GUIs.
- Accept the default blue and red initialization.
The script will launch a window that will allow you to specify the
observer names, output directory, starting frame number, etc.
The default is the correct answer for most questions, unless you are
the second half observer of KCWI/KCWI split night, in which case, make
sure your SA changes the data directory and the observer name for calibrations and at switchover.
- Verify windows.
Check that the following windows appear:
- On control0, the leftmost screen:
- On control1, the center screen:
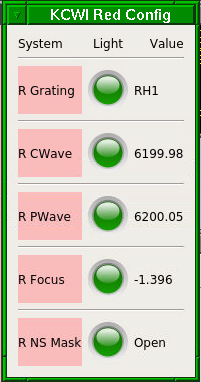
- On control2, the right screen:
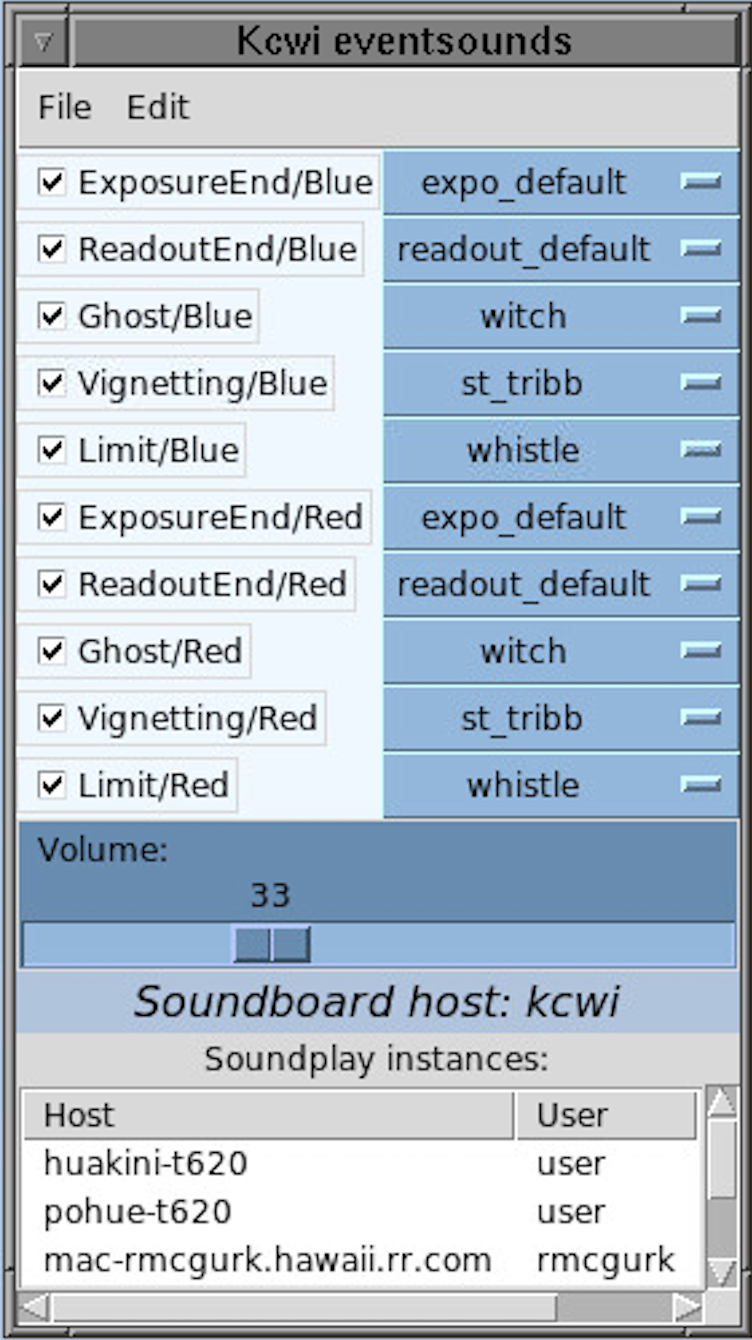
- On telstatus, the additional right screen:
- KCWI Keventsounds (screenshot)
- Facilities Summary, FACSUM.
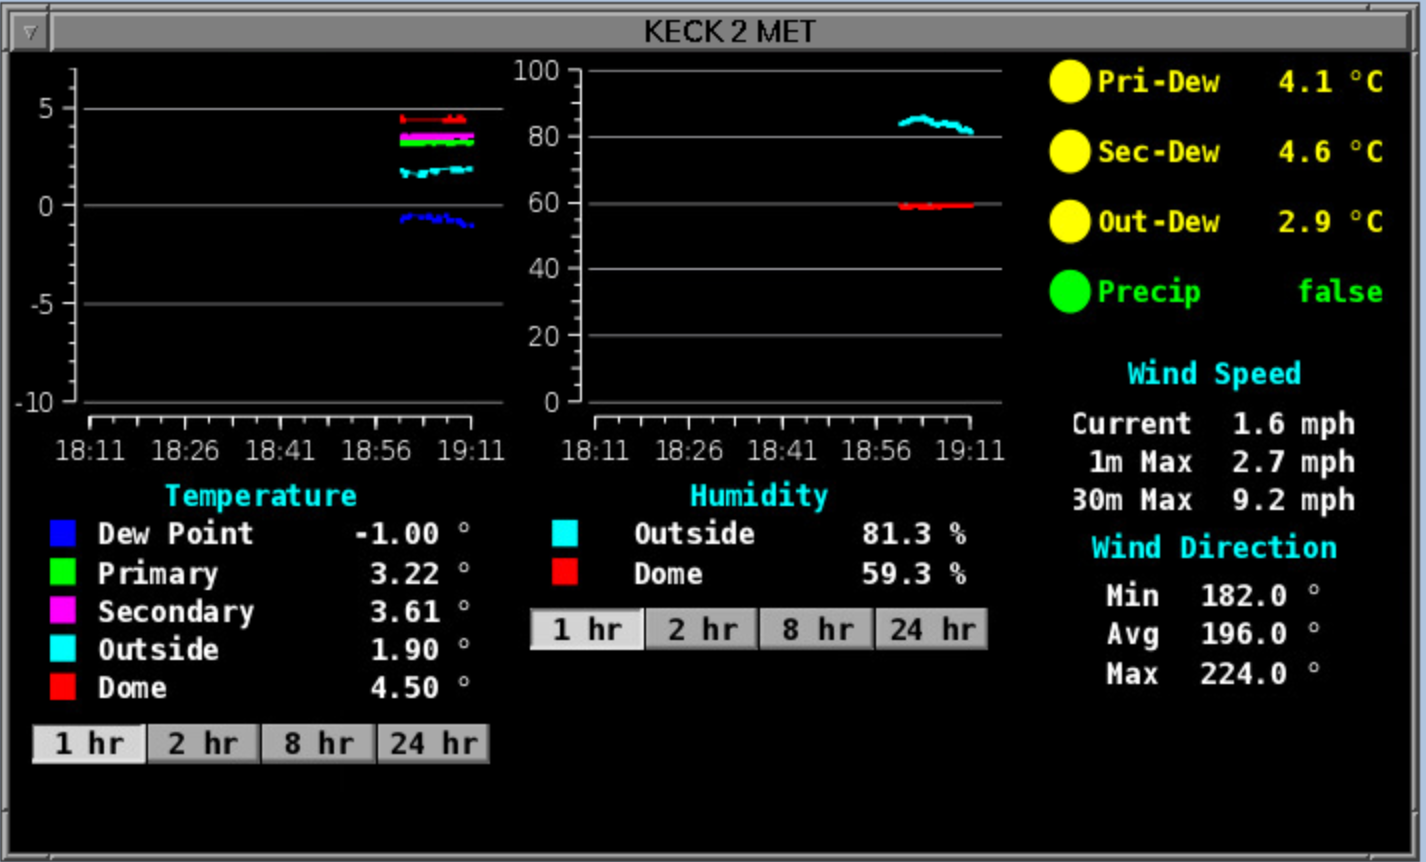
- Weather Center or Metrological Center, abbreviated MET (screenshot).
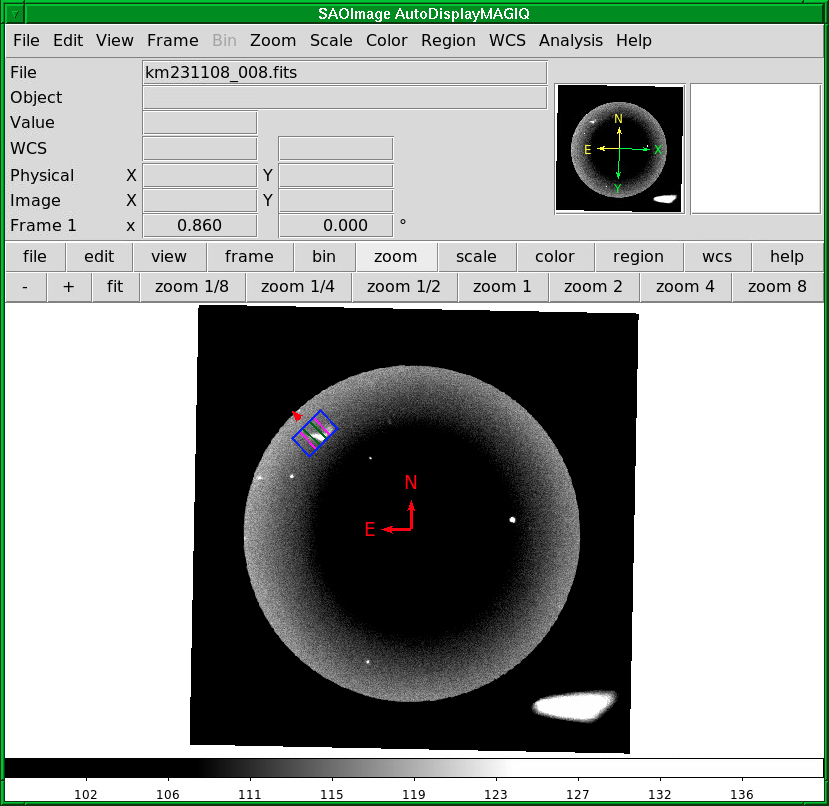
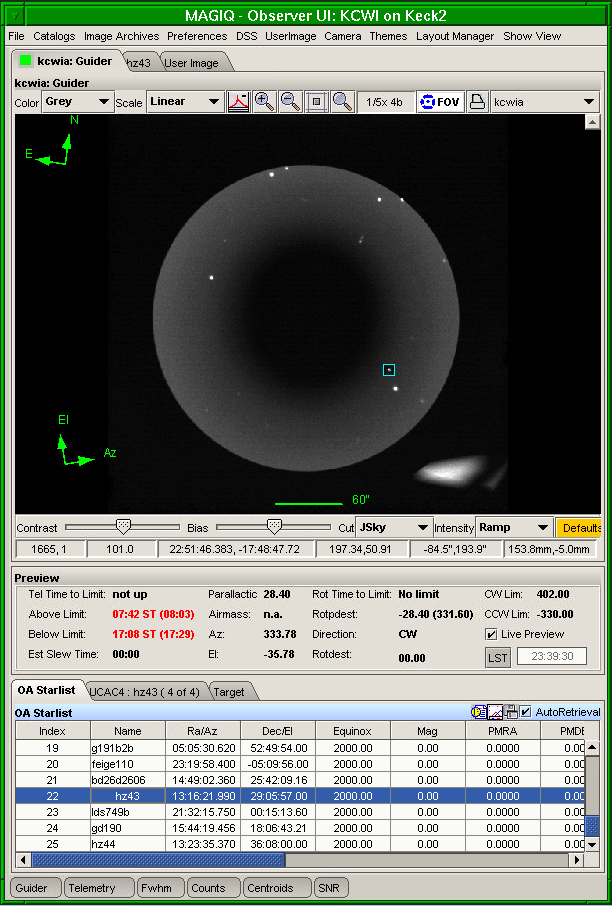
- This is also where we generally open Firefox to prepare instrument configurations (screenshot) as described below, and run MAGIQ to share starlists (screenshot).
Ask your SA if they have run the afternoon focus. If yes, skip this. If no, follow the directions below.
From the background menu, run:
KCWI Utilities -> Automated Afternoon sequence
This procedure will:
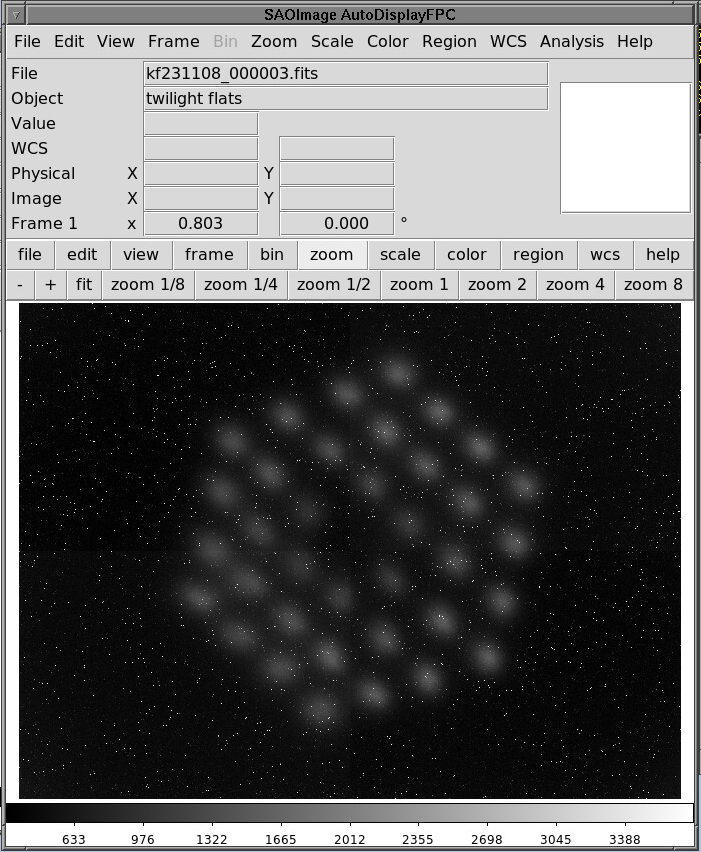
- Take a test exposure with the blue and red camera
- Turn on the focal plane camera and take a test exposure
- If exposures look good, tell the script to continue
- Focus the calibration unit
- Center the calibration unit
- Focus the blue and red camera
As the focus sequence completes, it will pop up a plot of the focus data and the fit performed on the data, first blue and then red. The best focus of the blue and red cameras are the center of a wide flat-bottomed data parabola. Currently, the automatic fit is not always centered. Please check if the fitted "best focus" reported in the script window is (1) the center of the flat region and (2) is within the normal values of -1.8 mm to -1.9 mm for blue and -1.4 mm to -1.3 mm for red. If the fitted value isn't right, note the correct values and let the focus script finish. Once done, observers can set a different focus value using the blue focus script "focusb -1.85" (insert your own value) and the red focus script "focusr -1.38". Ask your SA for help if needed.
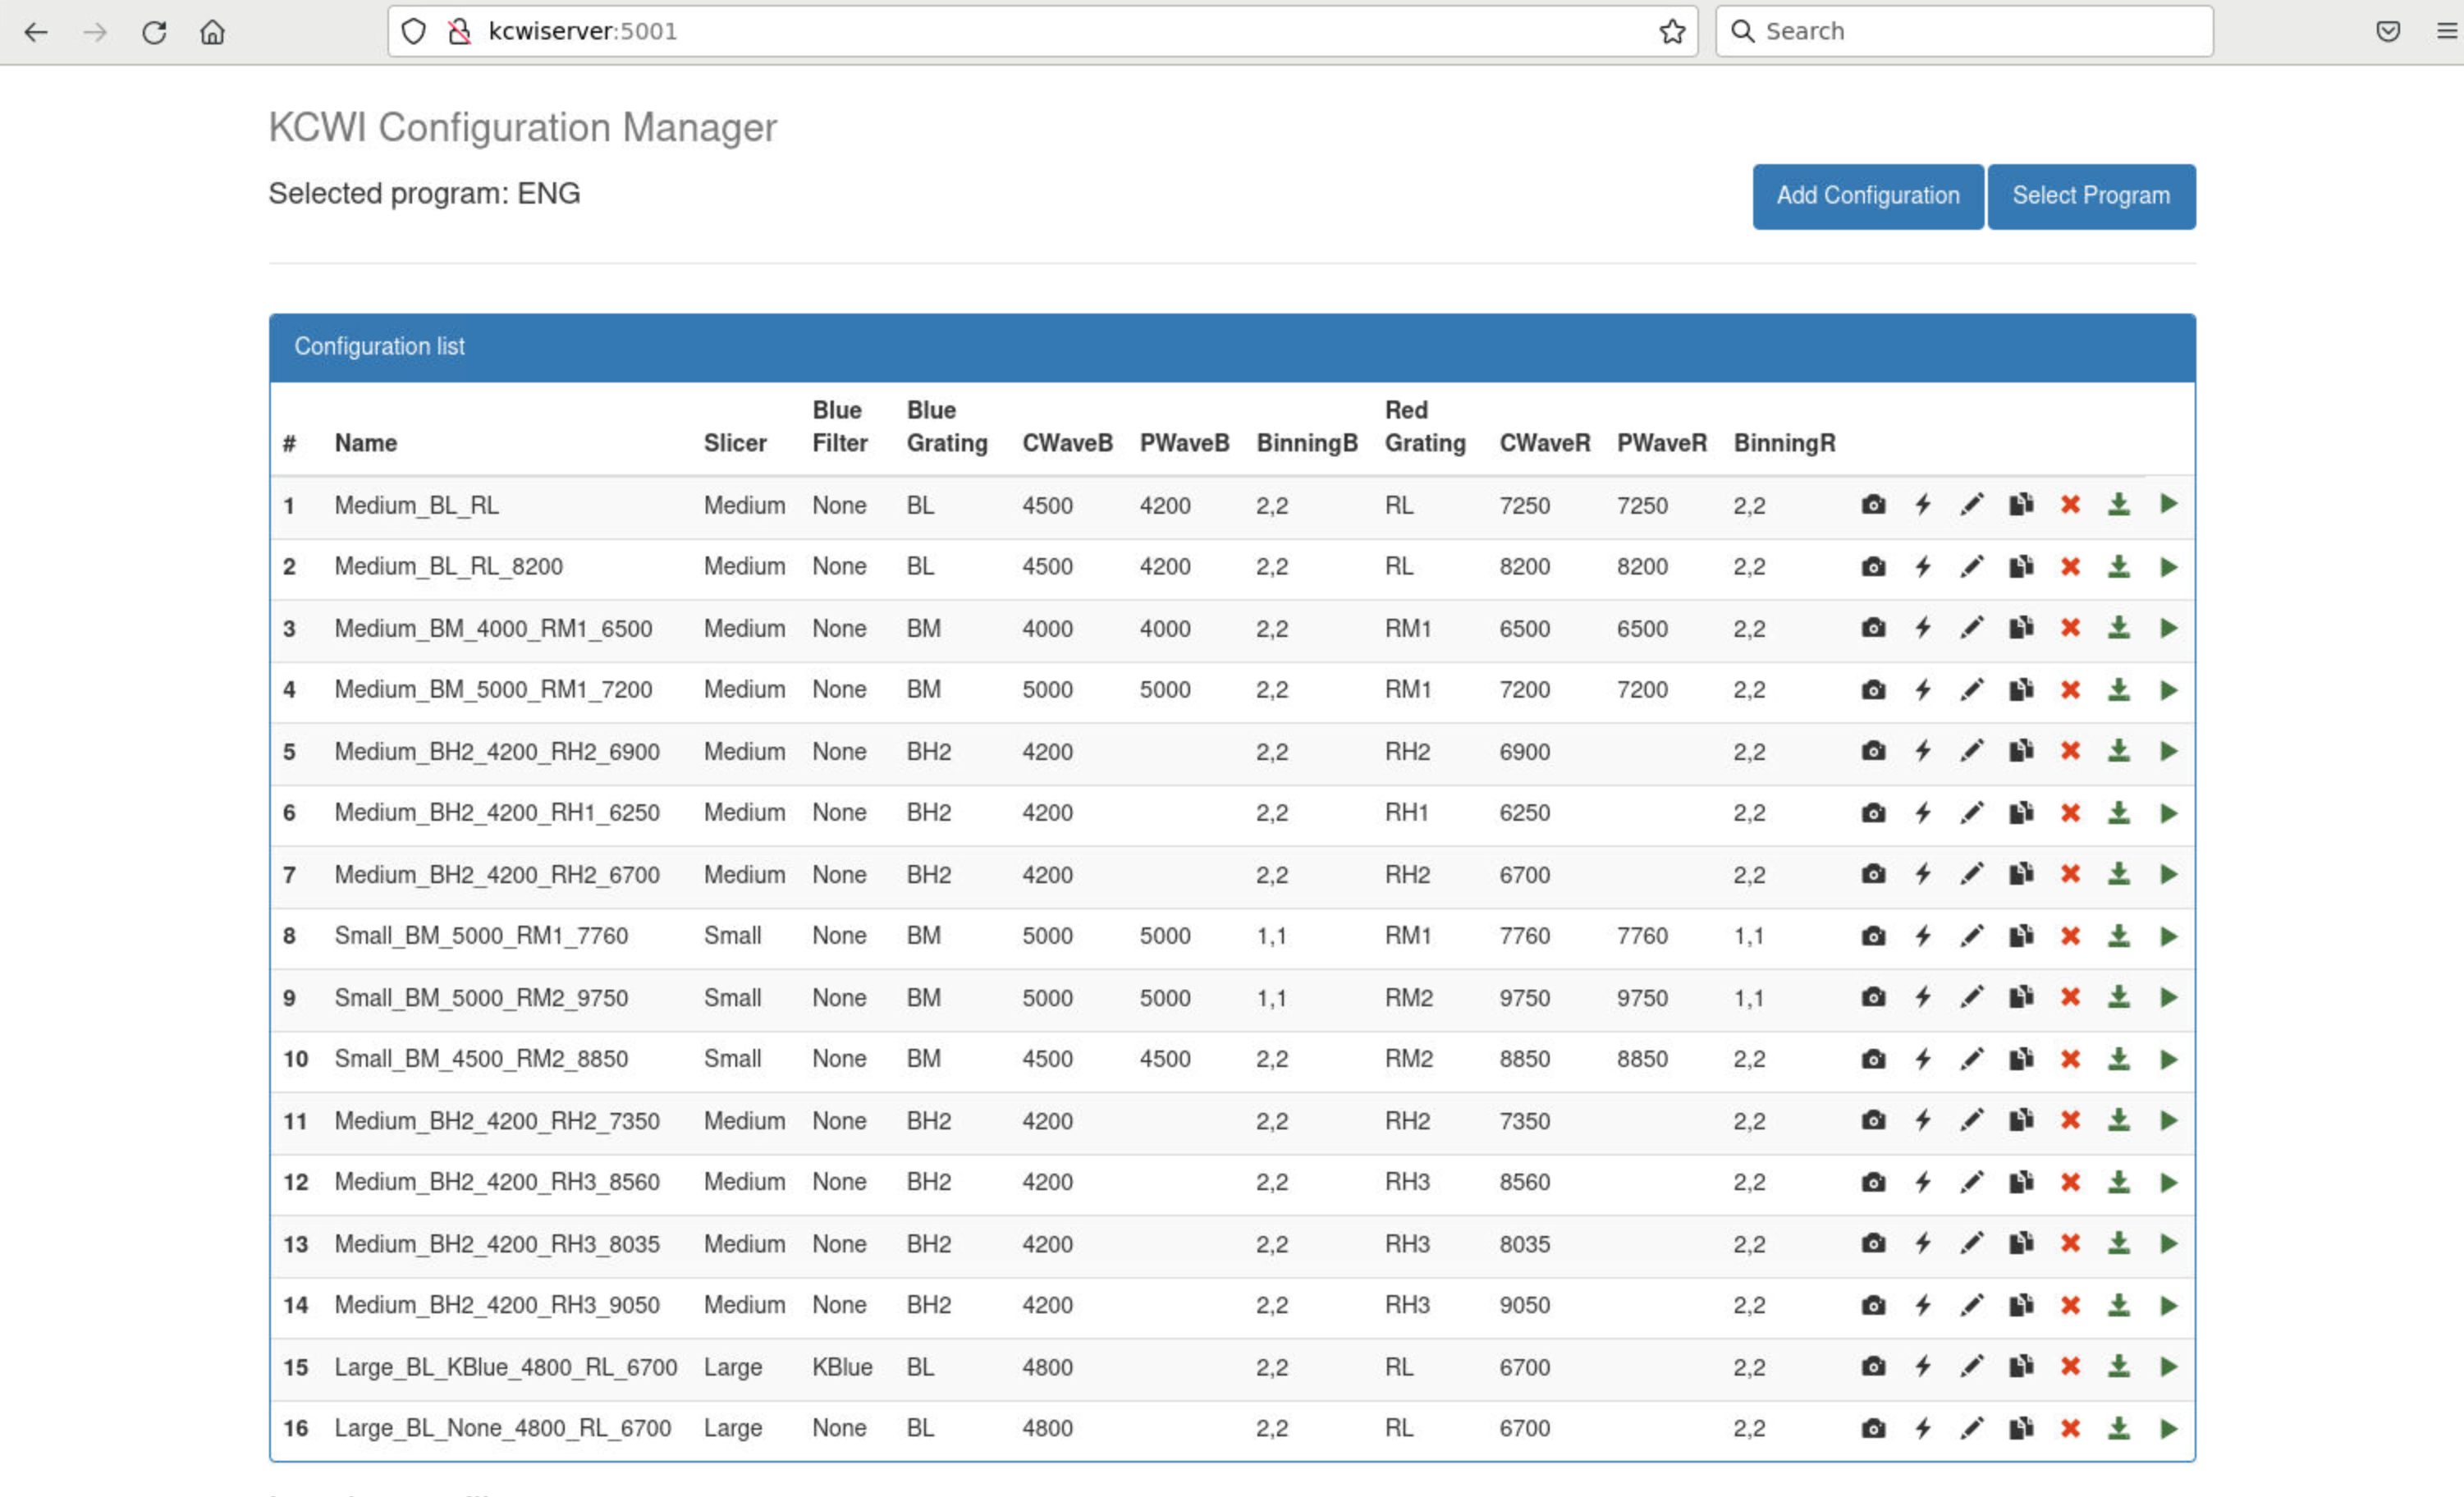
- Open a browser and point it to:
http://kcwiserver:5001
Note that this ONLY works when the KCWI software is running. The page looks like this
screenshot.
- Click the "Select Program" button in the upper right corner and then type your TAC-assigned program ID
in the box that appears (check the sixth column of the
observing schedule
if you don't know your program ID).
- Add as many configurations as needed. Make sure they have different names with NO spaces; dashes and underscores are fine. ALWAYS
click the "Default Cal Unit" and "Default Detector Config" buttons at the bottom of the Add Configuration page.
If you need to change the detector configuration, you can always do it after the configuration is added.
There is NO NEED to execute your configuration.
Notes on instrument configurations:
- Binning should be 2x2 for the Large and Medium slicer, and 1x1 for the Small slicer.
- Changing the binning on the blue detector causes extra noise. See here for more info.
- For ALL configurations except BL, the Central wavelength and the Peak wavelength should be exactly the same.
- For BL, set Peak Wavelength to be Central Wavelength - 300 Angstroms. Example: CW=4500, PW=4200.
Please check the SIAS page for updates on the status of the instrument and telescope. Do NOT run internal calibrations if KCWI is not released. Do NOT run dome flats if the telescope is not release. See the instrument status section for directions.
Taking the correct sequence of internal and dome calibrations is critical for the data reduction pipeline.
Fully automatic mode (RECOMMENDED)
The Calibration GUI will help you select the configurations to be calibrated and to run them. For this mode, see Calibration Checklist GUI. The Calibration GUI is very easy to use.
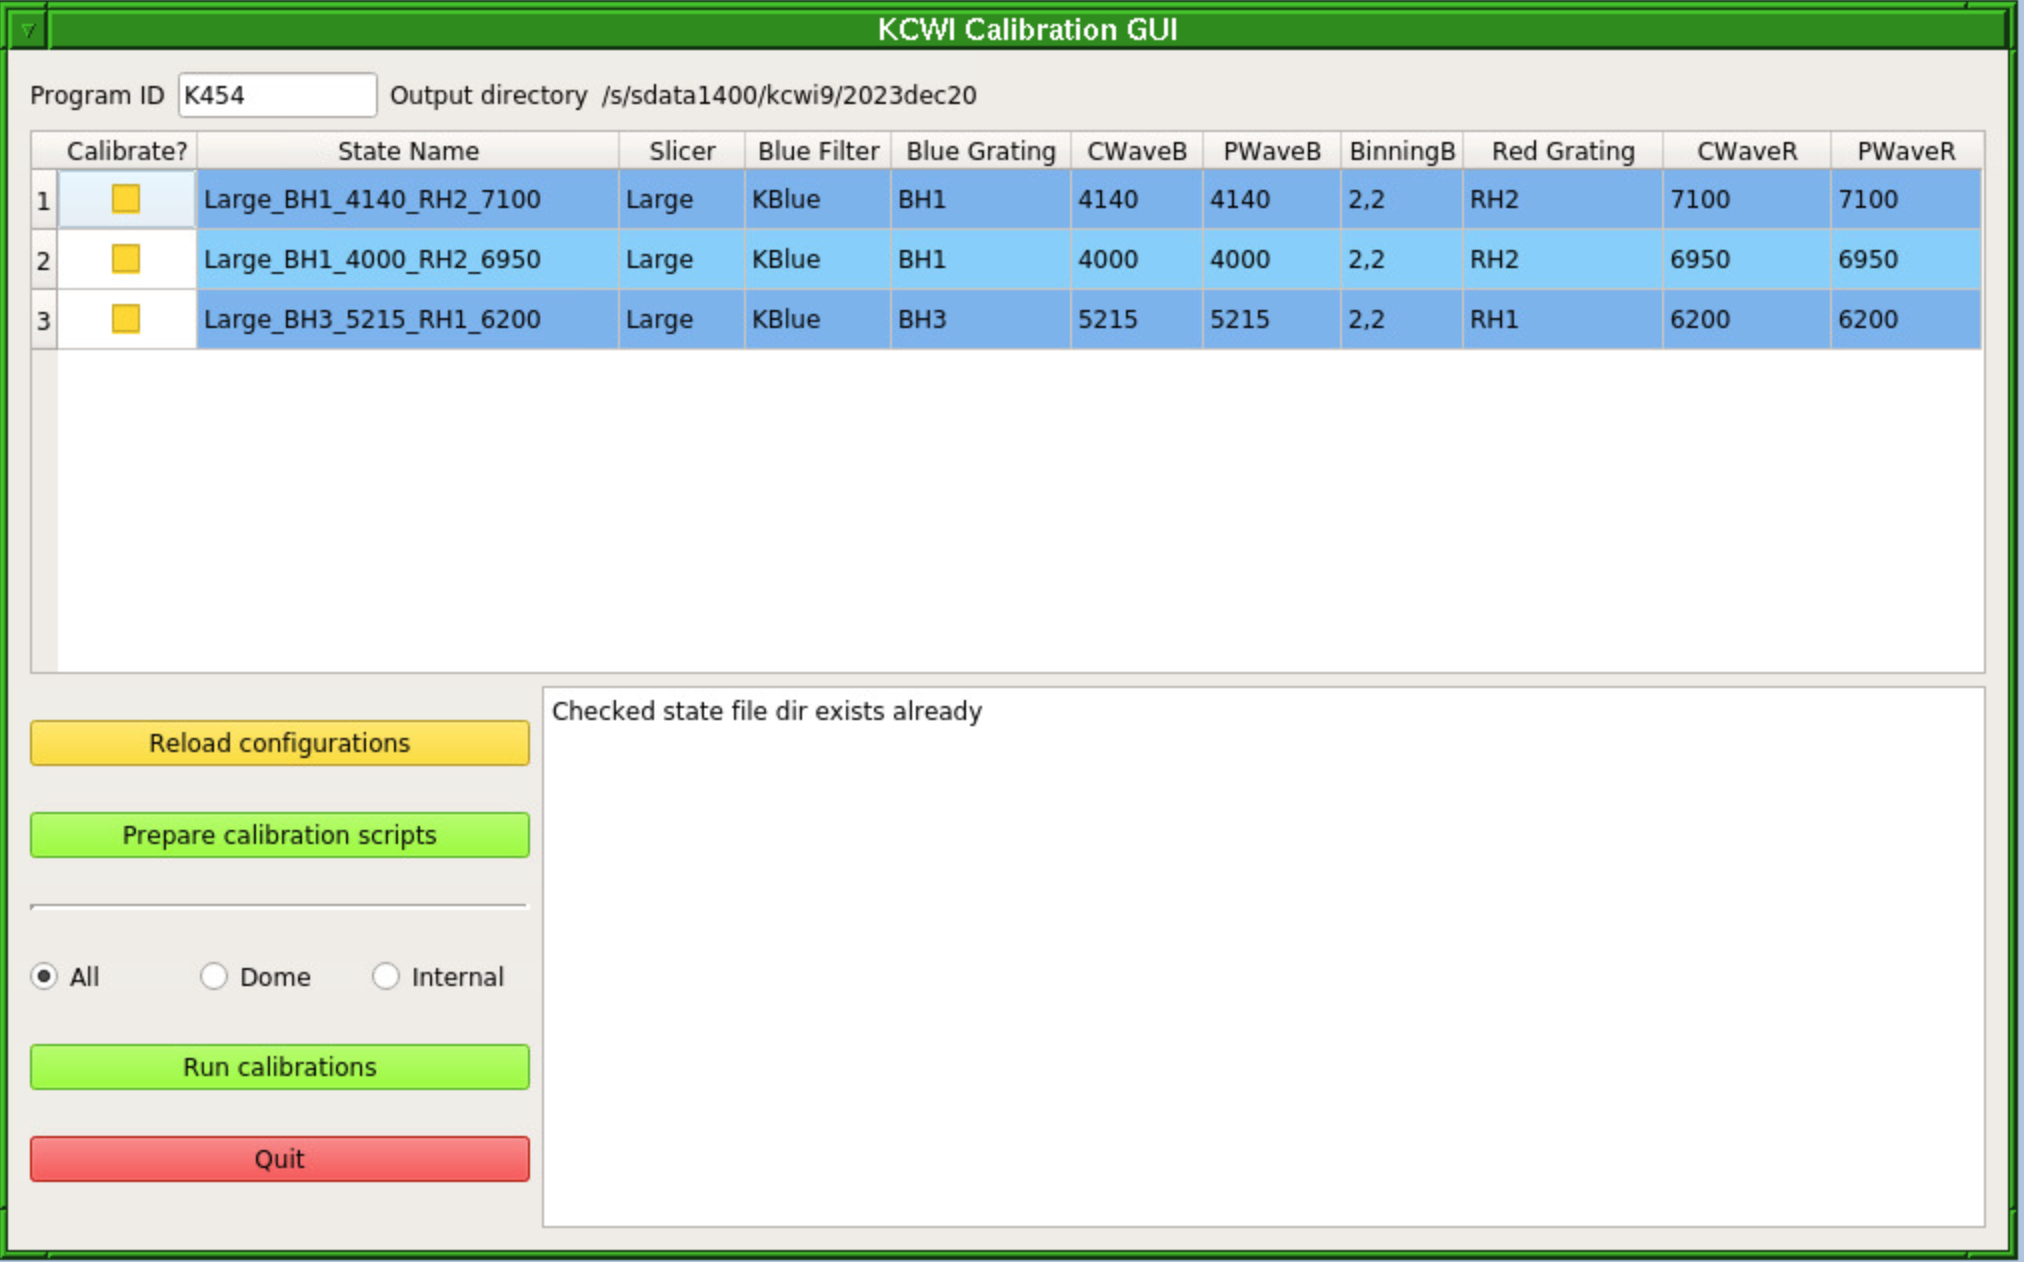
For command line access to the same functions, use: Calibration Checklist.
Manual mode
The Manual scripts linked here were used when KCWI was first delivered. While they work, they are outdated. For this reason, and unless there are compelling reasons to do otherwise, use the Calibration GUI or modern calibration scripts described above.
Format your targetlist as specified on the
Starlist File Format page.
Upload your targetlist via your Keck PI page
or as directed on the Starlist File Format page.
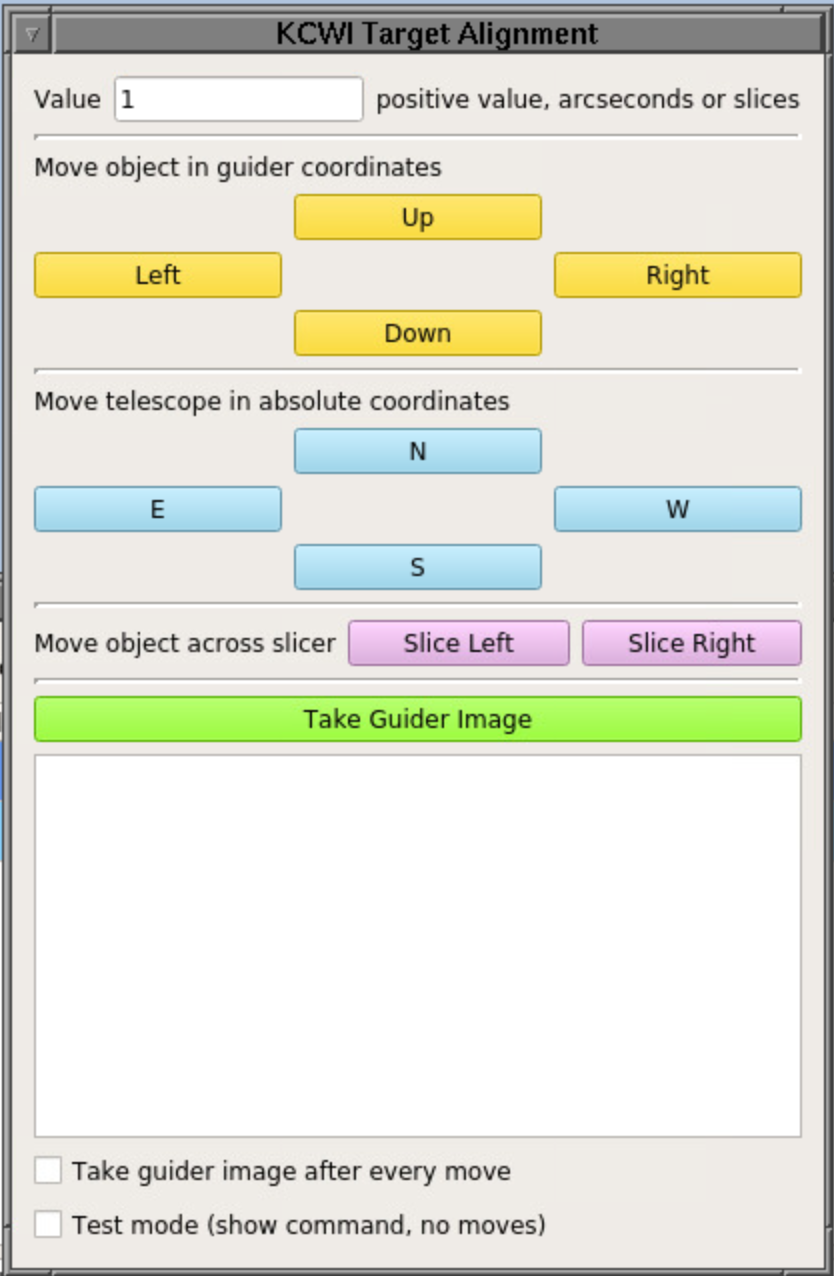
Once you have your targetlist uploaded into MAGIQ (File -> Load Private Starlist), make sure that your targets and any offsets uploaded correctly.
Observing Assistants customarily arrive at the summit around
5:30pm in winter and 6:00pm in summer. Once they arrive, you can
do one or more of the following:
- Greet the OA.
Introduce yourself to the OA and alert them to any immediate
needs that you will have. Tell them if you are taking
calibrations and inform them about your calibration
plans.
- Wait for the OA to get settled.
Setting up computers and bringing up all of the telescope
control systems requires some time, and things go wrong much
more often than we would prefer. Be patient while the OA
prepares the telescope for operation.
- Inform the OA about your
targetlist.
Now would be a good time to let the OA know where your
targetlist is, so they can verify that they have access to it.
- Inform the OA of your plans for the
night
It is always good practice to inform the OA of your science
plans: depending on the KCWI modes you plan to use (nod and
shuffle, type of slicer...), the OA will make decisions on how and when is
best to focus the telescope. The OA can also be asked about
specific observing techniques you are interested into (e.g
dithering, offset pointing, etc). Just before opening, your
SA will also be available to help with these issues. Do not be
shy and ask.
If you are reading this, you're probably very tired and
hungry. Moreover, the real work is still ahead of you. Now it is a
good idea to go get dinner and all other sources of sustainment
you may need during the night.
In each Remote Ops room there is a folder labelled Restaurant Guide for you to consult.
Please also note that Starbucks (across the road, in the Foodland
shopping center) closes, mercilessly and irrevocably, at 7:30 pm.
Waimea Coffee Company closes without remorse at 5:30pm every day.
Evening Startup Checklist