MAGIQ is the Multifunction Acquisition, Guiding, and Image Quality
project. In encompasses both hardware and software.
All instruments use MAGIQ software.
Technical pages are linked here.
- GUIs:
- MagiqGui (OA Gui) -- OA interface
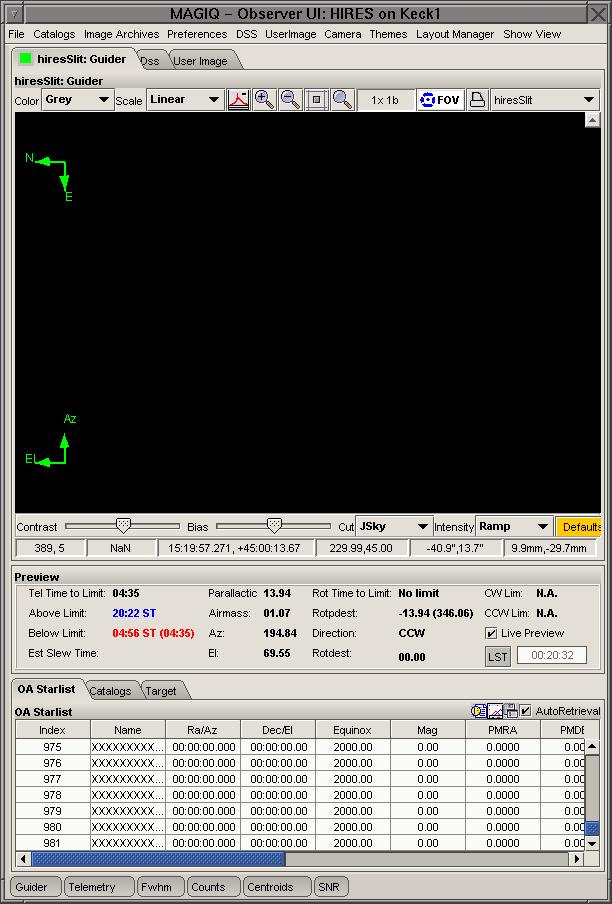
- ObserverUI -- Observer interface
- Camera Diagnostics -- Engineering interface
- MagiqServer -- a top-level server that delivers images to the
GUIs and sends commands from the GUIs to the low-level
software
- Low-level servers:
- Camera Server -- controls the camera parameters and takes the
images
- Mech Server -- controls the moving mechanisms of the MAGIQ
system
- Filter Wheel 1 -- holds neutral-density filters
- Filter Wheel 2 -- holds photometric and long-pass filters
- Focus -- allows remote control of guider focus
- Image Quality -- holds a Shack-Hartmann wavefront sensing
element
What you need to know to run MAGIQ
In this section we highlight important aspects of MAGIQ that
observers should understand to ease observing during the
night. This information comes from the MAGIQ
Observers User Manual.
Sharing Features
- Share the OA starlist
- The MAGIQ server must be running and the OA must have loaded the starlist.
- Select "File" from the top menu.
- Select "Map OA Starlist."
- Load a starlist
- Select "File" from the top menu
- Select "Load Private Starlist."
- From Dialog, select starlist of choice.
- Click on "Select a starlist to open."
- Append a starlist
- Select "File" from top menu
- Select "Append to Private Starlist"
- Choose the starlist to append to from the sub-memu
- From Dialog, select the starlist of choice
- Click on "Select a starlist to Open"
List Functions
- Select a target in the starlist
- Click on the object with the left mouse button
- Preview panel will update for the selected target
- DSS image will update for the target if auto-retrieval is enabled.
- Catalog information will update for the target if auto-retrieval is enabled.
- Cache DSS and catalog information
- Press the right mouse within the starlist window
- Select "Fetch DSS and catalogs for starlist" from the popup menu
- Plot rise times for all objects in the starlist
- Press the right mouse button within the starlist window
- Select "Immediate starlist plot" from the popup menu
- Graph will appear showing airmass, elevation, parallactic angle and observable times for all objects
Display Options
- Enable/Disable DSS Automatic retrival for targets
- Toggle "Auito retrieval" on the starlist toolbar
- Adjust contrast/bias
- Hold down shift button
- Place cursor on image
- Click and drag with the right mouse button
- Constrast is vertical, bias is horizontal direction
- Alternatively, use the contrast and bias slider bars
- Change scaling
- Use image toolbar
- Select scale algorithm from "Scale" dropdown menu
- Linear is the default scaling
- Change color
- Use the image toolbar
- Select "Color" from the "Color" dropdown menu
- Grey is the default color
- Change Intensity
- Use the image toolbar
- Select the intensity algorithm from the "Intensity" dropdown menu
- Ramp is the default intensity
Image Operations
- Print current image
- Use the image toolbar
- Press the "Print" button
- Save current image
- Right click on the image
- Choose "Save image as..." from the popup menu
- Fiducials
- Mark Fiducials - right click on image at point of interest
- Select "Mark Fiducial
- Clear Fiducials - right click on image
- Select "Clear Fiducial"
Advanced Features