Purpose
This checklist describes the procedure for replacing the arc lamps
Procedure: Synopsis
This is a brief version for use by experienced KCWI engineers and techs.
Novices should read the detailed procedure
below.
Procedure: Detail
Warnings
- Make sure power to the KCWI calibration system is off. This includes motion controllers and lamp power.
- You will be opening the instrument, so dome conditions must be sufficiently clean (e.g., no unusual dust in the air, no high wind, no atypically high humidity, etc.)
- If possible, ensure instrument purge (dry air) is running.
- The procedure can be performed by one person. Two is better.
- Always use gloves, face mask, hair net, and lab coat when opening the instrument.
- Never look at glowing lamp without UV eye protection.
- Dispose properly of old lamp(???)
Facilities, Equipment, and Tools
- Front left side of the instrument (as viewed from the rear, into the telescope) must be accessible. This means instrument not on kinematic points/pulled all the way into the Nasmyth port.
- Front left side of the instrument should be well illuminated.
- Clean flat surface available for work on lamp (e.g., desk, large cart).
- Lab gloves, face mask, hair net, lab coat.
- UV eye protection if you expect to turn the lamp on.
- 4 mm Allen wrench
- Small Phillips head screwdriver
- Replacement lamp
Preliminaries
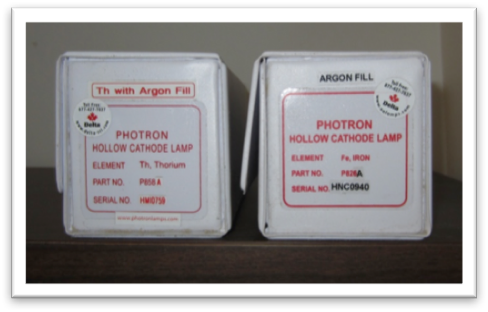
- KCWI uses two 1.5” diameter hollow cathode arc lamps from Photron, uncoded:
- Thorium argon (thar), P/N: P858A
- Iron argon (fear), P/N: P826A
-
Don lab coat, gloves, hair net, face mask, beard cover, if necessary

Remove outer instrument panel
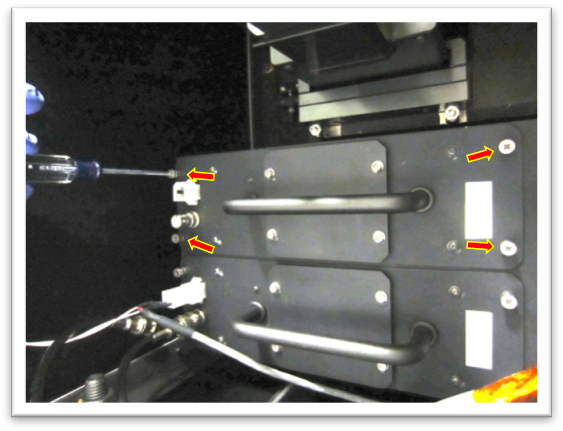
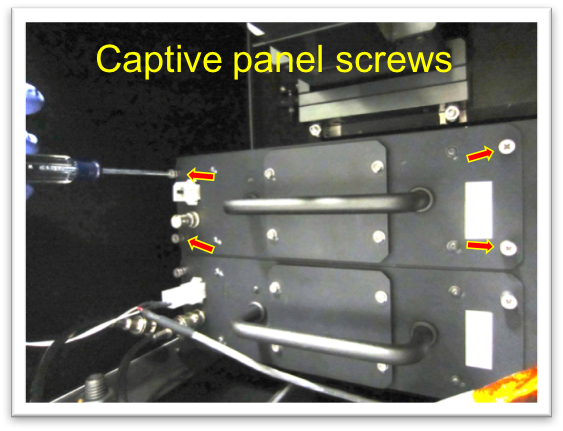
- Locate the 8 captive socket-button head screws on the bent panel, indicated by red arrors in the figure. They should be distinctively marked on the hardware.
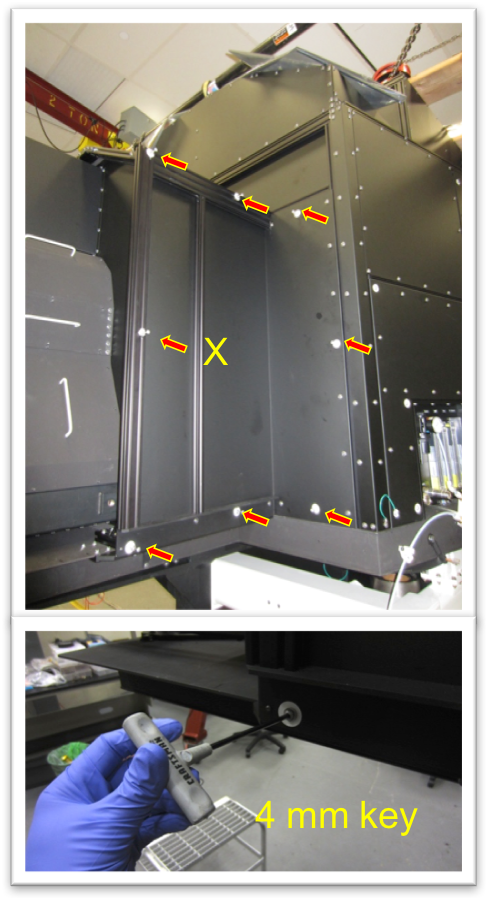
- Using a 4mm Allen key, back the screws off so they are captured only in the panl and free of the enclosure frame. Be careful not to cross thread.
- Slide the panl out first about an inch toward the front of the istrument, then toward you (side of the instrument). The panel weighs about 15 lbs
- Stow the panel safely until it can reinstalled
- The screw marked with the X can be used to temporarily secure the panel to the instrument, if needed
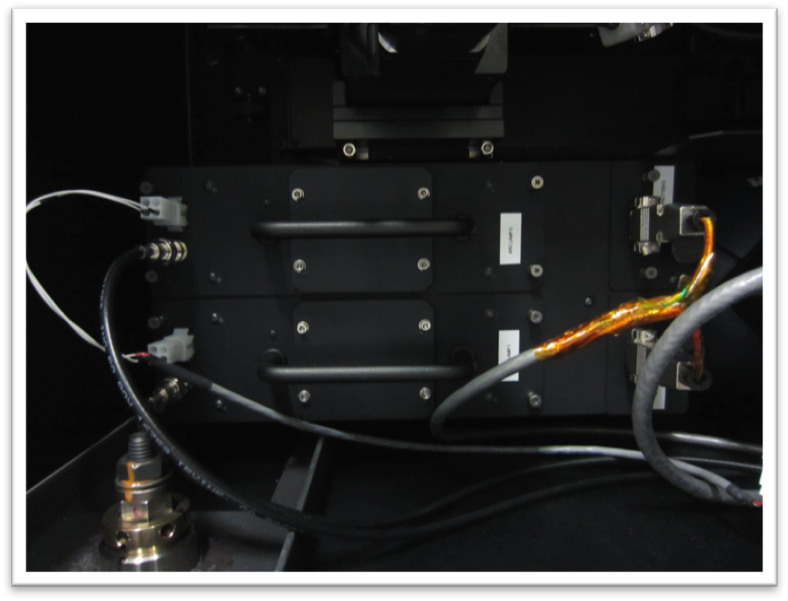
Remove calibration panel
- Disengage the 6 captive thumbscrews indicated by arrows. They are only threaded 1-2 threads.
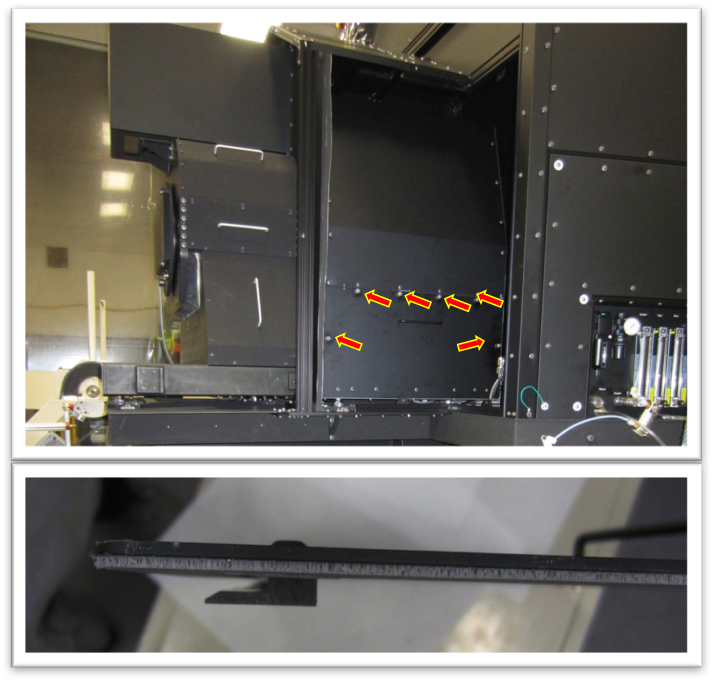
- Slide the panel upward to unhook the Delrin guide at the bottom inside of the panel (Shown in botton left image)
- Remove and stow the panel
Locate lamp to be replaced
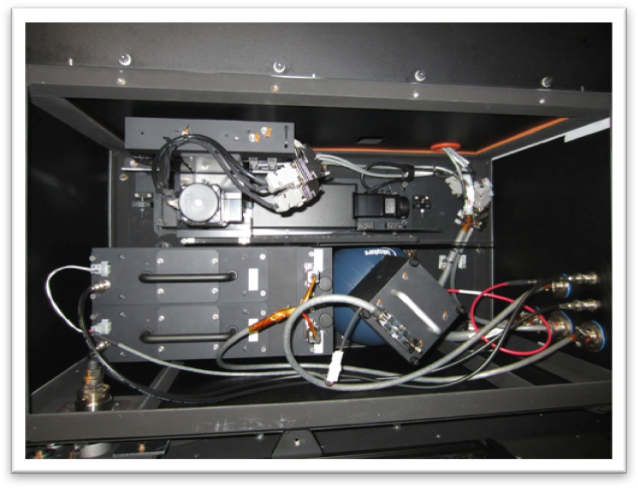
- The arc lamps are on the left side of the cabinet and are shown in the image. Arc Lamp 0 is FeAr, Arc Lamp 1 is ThAr
Extract lamp box
- Ensure that the power to the calibration unit is off
- Detach the Molex connector and SHV connector
- Unscrew, unsing a + screwdriver or your hand the 4 spring-loaded captive panel screws
- Slide the lamp cell out using the handle


Reinstall instrument panel (Optional)
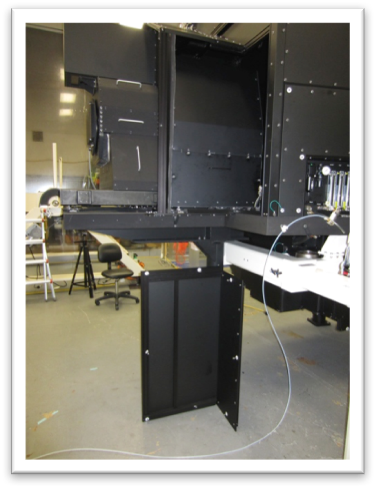
- If you anticitape lamps replacement taking longer than a few minutes, temporarily reinstall the instrument panel securing it in place with a single screw, as shown in with the X.
Remove old lamp from holder
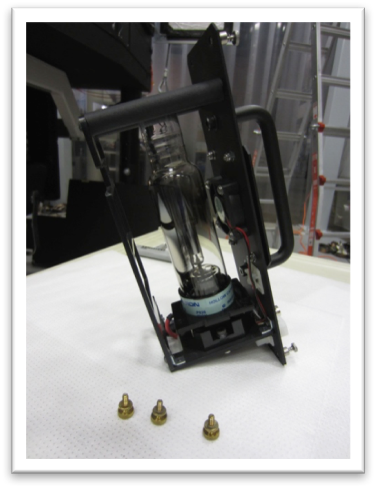
- Place the lamp cell on a flat surface as shown to the left
- Inspect lamp for damage - if anything is visible, re-evaulate extraction method
- Make sure you are wearing lab gloves and a face mask
- Make sure the lamp is cool to the touch
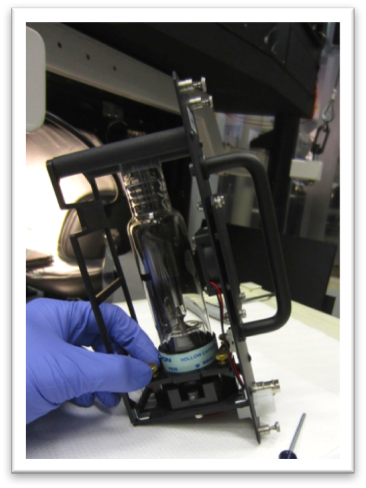
- Locate the black Delrin retainer holding the bottom lip of the lamp in place and remove the three brass thumbscrews
- Raise the retainer up so it is around the glass part of the lamp
- Pull the retainer out
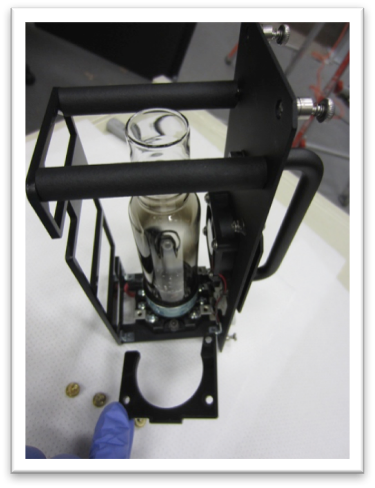
- Grasp the lamp by the plastic base with one hand. You will want to hold the cell with your other hand
- Pull upward. The lamp pins are held in place by friction in the socket and may require the lamp to be jostled to disengage
- Once the pins are clear of the socket, tilt the lamp and remove from the cell
- Dispose of the expired lamp responsibly
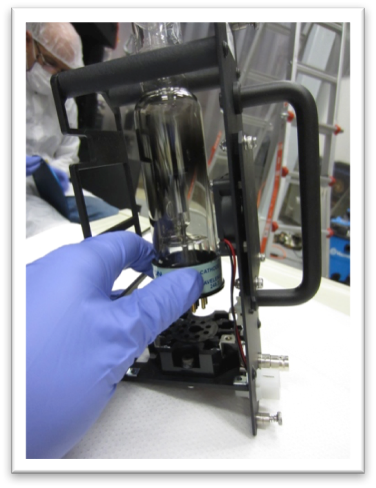
Install new lamp in cell
The steps to install the new lamp are very nearly the reverse of the steps that were needed to uninstall the old lamp. Key differences and additions are highlighted here.
- The base of the lamp may have as few as 2 pins
- Locate the boss on the central prong to determine lamp orientation with respect to the cell socket. Rotate the lamp such that the boss lines up with the notch in the relay socket
- Insert the lamp into the cell by angling it in from the side.
- Gently press the lamp pins into the sockt. The pins may bottom out and may be partially visible from the side
- Reinstall the Delrin retainer and brass thumbscrews. The retainer should lie flat. Do not overclamp.

- Insert lamp cell into lamp box as shown above. There are guides on the walls of the lamp box to help
- Fasten the 4 spring-loaded captive panel screws, do not over-torque
- Re-attach the Molex and SHV connectors
Close the instrument
- Reattach the internal calibration panel
- The captive thumb screw on the right side is finicky, be careful with that one
- Reattach the external instrument enclosure panel
- Lamp should be ready to use – take spectrum with spectrograph when possible/appropriate