| NIRC2 Image Sharpening |
1. Introduction :
The purpose of the image sharpening process is to estimate and compensate for the optical aberrations seen on the focal plane of the Near Infrared camera NIRC2. Most of these aberrations are not seen by the wavefront sensor which lies on a different lightpath; they represent the non-comon path aberrations. The nature of these aberrations will also depend on the NIRC2 camera and filter settings.
The software used for image sharpening was developed by Scott Acton and the application was further developed by Marcos van Dam. The program is written in IDL and is used from a Graphical User Interface. It has now been completely automated and works at the touch of a button. The key is to press the right button!
The program estimates the phase using a modified version of the Gerchberg-Saxton phase retrieval algorithm. It requires one or more images with different amounts of focus error (phase diversity) to compute the phase. Two images are adequate and having a third image improves the accuracy of the algorithm. Since the algorithm estimates the phase, using a narrowband filter improves the quality of the reconstruction. Once the phase is estimated, it gets converted to a wavefront and then this is used to drive the SFP Z-position and the DM actuators to cancel the measured wavefront. This process is performed iteratively, three times by default. The final phase on the DM gets saved using the WYKO interferometer, and the position of the SFP must be manually saved with the SC GUI.
A document to calibrate the Image Sharpening Algorithm is available.
2. Procedure:
The following steps are needed to run the image sharpening algorithm.
- Run the calibration set-up and the DM-to-lenslet registration.
- If also doing an LGS calibration, make sure that the TSS and DM-to-lenslet registrations have been done.
- Bring up an IDL calibration widget and click on DM control .
- Click on the NIRC2 img shp button of the calibration widget. Alternatively, you can bring up the tool by typing idl on a k2aoserver window to start IDL and start the image sharpening widget by typing image_sharpening.
- Check that NIRC2 is running and bring up a NIRC2 status display and quicklook if you wish to monitor the process.
- Press " Auto Image Sharpen". The following will automatically happen:
- The camera settings will be set automatically.
- The SFP and SND will move to the correct position.
- NIRC2 images will be captured with different levels of defocus.
- The image will be reduced.
- The image sharpening algorithm will run.
- The phase will be applied to the DM and focus will be offloaded to the SFP.
- The program will iterate three times and converge to give the best image quality.
- The phase will be read by the WYKO interferometer and saved. This requires you to accept or reject the phase measured by the WYKO.
Examples of good returned phase map Examples of bad returned phase map 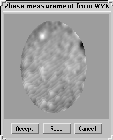


- Click on "More" the SFP line in the SC GUI. It should read nirc2 on the bottom right but possibly not on the bottom left.
- Note: Image sharpening is performed at the optimum location for the instrument, the nirc2 position of the SFP. AO calibrations that follow, in particular the WFS calibration, are performed on Axis, optnirc2. The Z position of the te two positions should be the same but they are offset in XY by a few mm.
- Click on "Define". Click OK at the prompt.
- Click on "Save". Click OK at the prompt.


You are now ready to do the WFS (and LBWFS) calibration.
Below is a picture of the GUI.

| Keck
AO Team
Contact . Last update: March 9, 2006 (dlm) |